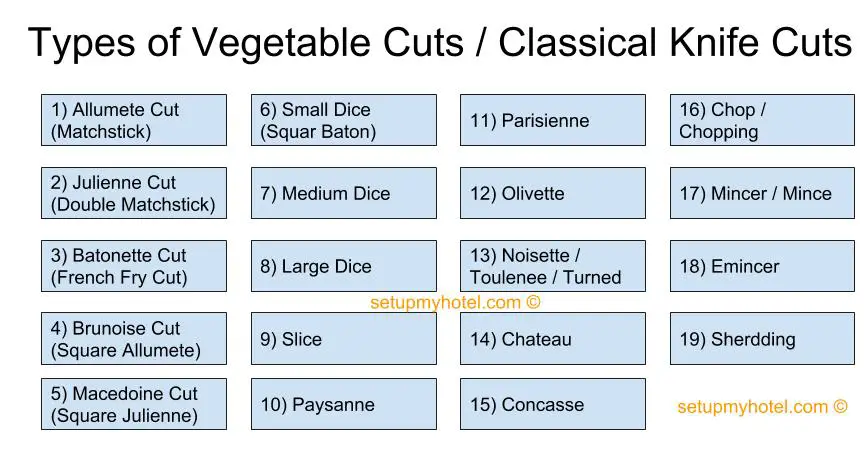
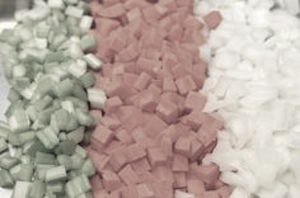
Types Of Vegetable Cuts Used in the Kitchen / Food Production
Vegetables are a staple in many kitchens, and their preparation is just as important as the cooking process itself. One aspect of vegetable preparation is the type of cut used. There are several types of vegetable cuts commonly used in the kitchen, each with its own unique purpose.
Firstly, the julienne cut is a thin, matchstick-like cut that is often used for salads or stir-fries. It requires precision and a sharp knife to achieve the desired size and shape. Secondly, a dice cut is a small, cubed cut that is often used in soups, stews, and sauces. It’s a versatile cut that allows for even cooking and easy incorporation into dishes.
Thirdly, a chiffonade cut is a thin, ribbon-like cut typically used for leafy greens like spinach or basil. It’s a delicate cut that’s often used as a garnish or added to dishes for texture and flavour. Lastly, a brunoise cut is a very small, diced cut used in sauces, soups, and other dishes where a fine texture is desired. It requires precision and patience to achieve the desired size and shape.
The Food Production department or Kitchen makes a wide variety of dishes, and the chefs working in the kitchen should be very familiar with the different variety of cuts used in the advanced culinary preparation. The below-mentioned types of knife cuts act as the base for kitchen preparation and are called the ‘Classical Cuts’ / ‘Classical Vegetable Cuts’ / ‘Basic Knife Cuts’.
Before you start practising any type of vegetable cut, it’s important to have the right tools and equipment. You’ll need a sharp chef’s knife, a cutting board, and a vegetable peeler. It’s also helpful to have a mandoline slicer or a food processor with a slicing attachment to ensure uniformity in your cuts.
Remember to practice caution and proper knife skills when working with sharp knives. Always hold the vegetables securely and curl your fingers inward to protect them while cutting. Make sure to keep your knife sharp and your cutting board stable to prevent accidents while cutting.
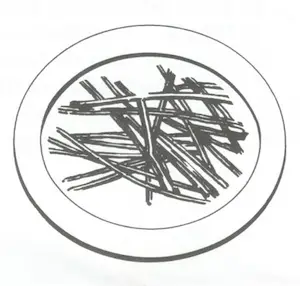
1. Allumete Vegetable Cut (Matchstick) – 1/16” X 1/16” X 2”
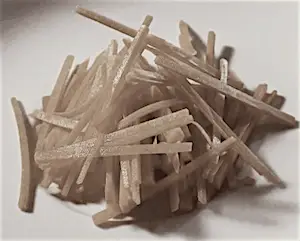
The Allumete Cut, also known as the Matchstick is a type of vegetable cut that measures an exquisite 1 16” by 1 16” by 2′. This cut is known for its delicate and slender appearance, and it’s often used to add texture and elegance to dishes. The Allumete Cut is commonly used for the main course and French cuisine, particularly in dishes such as Soupe à l’oignon (French Onion Soup) or RatatouilleSliced onion; egg-plant; baby marrow; tomatoes' pimentoes; etc.; stewed together as a vegetable dish....
The allumette cut, also known as the matchstick cut, involves slicing vegetables into thin, elongated strips resembling matchsticks. This cut is commonly used for garnishes, salads, and stir-fries, providing a slender and delicate appearance. Here’s a guide on how to perform an allumette (matchstick) vegetable cut:
Allumette (Matchstick) Vegetable Cut:
Ingredients:
- Vegetables of your choice (commonly used for allumette include carrots, bell peppers, or jicama)
Equipment:
- Chef’s knife or a suitable cutting tool
- Cutting board
Instructions:
- Select Vegetables:
- Choose fresh and firm vegetables suitable for the allumette cut.
- WashWash - 1) Brushing or coating a food item with a liquid such as egg white; milk or egg wash. 2) The ... and Prep:
- Wash the vegetables thoroughly and, if necessary, peel them.
- Cut Ends:
- Trim the ends of the vegetables for a neat appearance.
- Stabilize:
- Cut a thin slice off one side of the vegetable to create a flat surface for stability.
- Create Planks:
- Turn the vegetable so the flat side is down, and make a vertical cut to create a flat plank.
- AllumetteAllumette (al-yoo-meht) - French term for matchstick cut of 1/8 inch x 1/8 inch X 2 inches (3 millim... Cut:
- Make even, vertical cuts to create thin, matchstick-shaped strips. Aim for strips that are very thin, typically around 1/16 inch to 1/8 inch (0.16 to 0.32 cm) in width.
- Uniformity:
- Aim for uniformity in size to ensure an even appearance in your dish.
- Use in Recipes:
- Allumette-cut vegetables are often used as a decorative element in salads, as a garnish for dishes, or as an ingredient in stir-fries.
Example Recipe: Allumette Vegetable Salad
Ingredients:
- Allumette-cut vegetables (carrots, bell peppers, jicama)
- Mixed salad greens
- Cherry tomatoes, halved
- Balsamic vinaigrette dressing
- Feta cheese (optional)
- Fresh herbs (parsley, chives) for garnish
Instructions:
- Prepare Allumette Vegetables:
- Allumette-cut carrots, bell peppers, and jicama.
- Assemble Salad:
- In a large bowl, combine the allumette-cut vegetables with mixed salad greens and halved cherry tomatoes.
- Dress the Salad:
- Drizzle balsamic vinaigrette dressing over the salad and toss gently to coat.
- GarnishGarnish - The artistic complementing of a food item with other food or edible item.:
- If desired, crumble feta cheese over the salad for added flavor.
- Serve:
- Serve the allumette vegetable salad chilled, garnished with fresh herbs.
The allumette cut provides an elegant and slender appearance to dishes, enhancing their visual appeal. Experiment with different vegetables and incorporate allumette cuts into various recipes for a delicate touch. Adjust the ingredients and seasonings based on your preferences and the specific recipe you are preparing.
Example Main course menu with Allumete Cut: Matchstick Beef Stir-Fry. Tender strips of beef are meticulously sliced into the Allumete shape and stir-fried with an array of colorful vegetables. The uniformity of the matchstick cuts ensures even cooking, resulting in a harmonious blend of textures and flavors. Usually Served over a bed of steamed jasmine rice, this dish offers a satisfying and visually appealing dining experience.
How To Achieve an Allumete Cut?
- Start by selecting a fresh ingredient, such as a vegetable or piece of meat, that you want to cut into Allumete shapes.
- Ensure that the ingredient is cleaned and trimmed, removing any excess ends or tops.
- Measure and mark the desired dimensions for the Allumete cut. In this case, it would be 1/16” by 1/16” by 2”.
- Use a sharp knife to carefully slice the ingredients into long, thin strips. Aim for a thickness of 1/16” (around 1.5 mm) for both width and height.
- Once you have the strips, carefully cut them into pieces that are 2 inches (5 cm) in length. Ensure that each piece maintains the 1/16” by 1/16” dimensions.
- Repeat the slicing and cutting process with the remaining portion of the ingredient until you achieve the desired amount of Allumete cuts.
2. Julienne Vegetable Cut (DoubleA guest room assigned to two people. In beverage operations; a drink prepared with twice the standar... Matchstick) – 1/8” X 1/4” X 2”
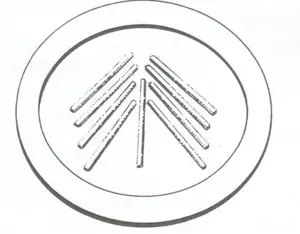
The julienne cut, also known as the “double matchstick,” involves cutting vegetables into thin, uniform matchstick-shaped strips. This cut is often used for salads, stir-fries, and garnishes, providing a delicate and elegant appearance. Here’s a guide on how to perform a julienne vegetable cut:
Julienne (Double Matchstick) Vegetable Cut:
Ingredients:
- Vegetables of your choice (commonly used for julienne include carrots, bell peppers, zucchini)
Equipment:
- Chef’s knife or a suitable cutting tool
- Cutting board
Instructions:
- Select Vegetables:
- Choose fresh and firm vegetables suitable for julienning.
- Wash and Prep:
- Wash the vegetables thoroughly and, if necessary, peel them.
- Cut Ends:
- Trim the ends of the vegetables for a neat appearance.
- Stabilize:
- Cut a thin slice off one side of the vegetable to create a flat surface for stability.
- Create Planks:
- Turn the vegetable so the flat side is down, and make a vertical cut to create a flat plank.
- Julienne Cut:
- Stack the planks and make even, vertical cuts to create thin, matchstick-shaped strips. Aim for strips that are about 1/8 inch to 1/4 inch (0.3 to 0.6 cm) in width.
- Uniformity:
- Aim for uniformity in size to ensure an even appearance in your dish.
- Use in Recipes:
- Julienne-cut vegetables are versatile and can be used in salads, stir-fries, wraps, or as a garnish.
Example Recipe: Julienne Vegetable Stir-Fry
Ingredients:
- Julienne-cut vegetables (carrots, bell peppers, zucchini)
- Soy sauce
- Sesame oil
- Garlic, minced
- Ginger, grated
- Green onions, chopped
- Sesame seeds for garnish
Instructions:
- Stir-Fry Julienne Vegetables:
- Heat sesame oil in a wok or pan.
- Add minced garlic and grated ginger, and stir-fry until fragrant.
- Add the julienne-cut vegetables and stir-fry until they are tender-crisp.
- Season:
- Drizzle soy sauce over the vegetables and toss to coat.
- Finish:
- Garnish with chopped green onions and sesame seeds before serving.
- Serve:
- Serve the julienne vegetable stir-fry over rice or noodles.
The julienne cut adds a refined and delicate touch to dishes, making it a popular choice for enhancing the visual appeal of various culinary creations. Adjust the ingredients and seasonings based on your preferences and the specific recipe you are preparing.
With dimensions typically ranging from 1/8” to 1/4” in thickness and 1-2 inches in length, the Julienne cut offers a versatile way to incorporate vegetables into various recipes.
Several dishes showcase the finesse of the Julienne cut. Starting with the Rainbow Julienne Salad, a colorful medley of julienned carrots, bell peppers, cucumbers, and radishes. This refreshing salad combines the crispness of the Julienne-cut vegetables with a tangy vinaigrette, creating a harmonious blend of flavors and textures.
For a satisfying main course, like the Julienne Vegetable Stir-Fry. where an assortment of julienned vegetables such as carrots, snow peas, and zucchini are quickly sautéed to retain their crunchiness. Tossed in a savory sauce and served over steamed rice or noodles, this dish highlights the versatility of the Julienne cut while providing a healthy and flavourful option.
How To Achieve a Julienne Cut?
- Start by selecting a fresh vegetable of your choice, such as carrots, bell peppers, or zucchini.
- Wash the vegetables thoroughly under running water to remove any dirt or debris.
- Trim off any ends or tops of the vegetable to create a clean, even surface.
- Slice the vegetable lengthwise into long, thin planks or slices, aiming for a thickness of about 1/8” to 1/4”.
- Stack a few planks or slices on top of each other to create a neat pile.
- With your non-dominant hand, hold the pile of planks firmly, keeping your fingers curled and away from the blade.
- Using a sharp chef’s knife, carefully slice across the planks or slices, perpendicular to their length, to create thin strips. Aim for a thickness of about 1/8” to 1/4”.
- Continue slicing through the pile of planks or slices until you have achieved the desired amount of Julienne-cut vegetables.
- Repeat the process with the remaining vegetables until you have obtained the desired quantity of Julienne-cut strips.
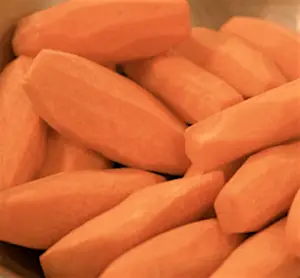
3. Batonette Vegetable Cut (French FryFry / Frying - To cook in hot oil or fat. Cut) – 1/4” X 1/4” X 2”
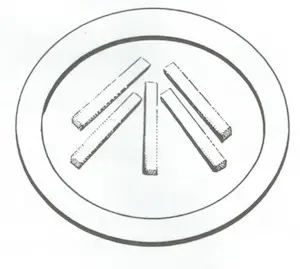
The batonnet cut, often referred to as the “French fry cut,” is a method of cutting vegetables into evenly-sized, elongated sticks. This cut is commonly used for making French fries or other dishes where uniformity is key. Here’s a guide on how to perform a batonnet vegetable cut:
Batonnet (French Fry Cut) Vegetable Cut:
Ingredients:
- Potatoes or vegetables of your choice
Equipment:
- Chef’s knife or a suitable cutting tool
- Cutting board
Instructions:
- Select Vegetables:
- Choose firm and evenly-sized vegetables suitable for batonnet cutting. Commonly used for French fries, potatoes are a popular choice.
- Wash and Peel:
- Wash the vegetables thoroughly. If using potatoes, you may peel them if desired, or leave the skin on for added texture.
- Cut Ends:
- Trim the ends of the vegetables for a neat appearance.
- Stabilize:
- Cut a thin slice off one side of the vegetable to create a flat surface for stability.
- Create Planks:
- Turn the vegetable so the flat side is down, and make a vertical cut to create a flat plank.
- Batonnet Cut:
- Stack the planks and make even, vertical cuts to create sticks. The size of the batonnet can vary, but for a traditional French fry cut, aim for sticks that are about 1/4 inch to 1/2 inch (0.6 to 1.3 cm) in width.
- Uniformity:
- Aim for uniformity in size to ensure even cooking.
- Use in Recipes:
- Batonnet-cut vegetables, especially potatoes, are commonly used to make French fries. They can also be used in other recipes, such as stir-fries or as a side dish.
Example Recipe: Homemade French Fries
Ingredients:
- Batonnet-cut potatoes
- Vegetable oil for frying
- Salt to taste
Instructions:
- Preheat OilSeveral kinds of oil are used to make salad dressing;e.g. olive; peanut; sunflower; walnut; grape se...:
- Heat vegetable oil in a deep fryer or large, deep pot to around 350°F (175°C).
- Fry the Batonnet-Cut Potatoes:
- Carefully add the batonnet-cut potatoes to the hot oil in batches to avoid overcrowding.
- Fry until the potatoes are golden brown and crispy.
- Drain and Season:
- Use a slotted spoon to remove the fries from the oil and place them on paper towels to drain excess oil.
- Season with salt immediately while they are still hot.
- Serve:
- Serve the homemade French fries hot with your favorite dipping sauces.
The batonnet cut is a classic technique for creating uniform sticks, commonly associated with the beloved French fry. Experiment with different vegetables or adjust the size to fit your culinary preferences.
The French Fry cut is commonly used for root vegetables like carrots, parsnips, and turnips. It’s also a great option for celery and bell peppers. The thin shape of these vegetable strips makes them ideal for sautéing or stir-frying as they cook quickly and evenly. Additionally, this cut can add visual appeal to dishes by giving them a uniform appearance.
How To Achieve a Batonette Cut?
- Start by selecting a fresh vegetable of your choice, such as carrots, celery, or zucchini.
- Wash the vegetables thoroughly under running water to remove any dirt or debris.
- Using a sharp chef’s knife, trim off any ends or tops of the vegetable to create a clean, even surface.
- Cut the vegetable into segments of your desired length, typically around 2-3 inches.
- Stand one of the segments upright on the cutting board, ensuring it is stable and won’t roll.
- Hold the top of the segment with your non-dominant hand to provide stability.
- With your dominant hand, carefully slice the segment lengthwise into planks or slices. Aim for a thickness of about 1/4 inch.
- Once you have a stack of planks, align them and carefully slice across their length to create Batonette-shaped sticks. Aim for a thickness of about 1/4 inch and a length of 2-3 inches.
- Repeat the process with the remaining segments until you have achieved the desired amount of Batonette cut vegetables.
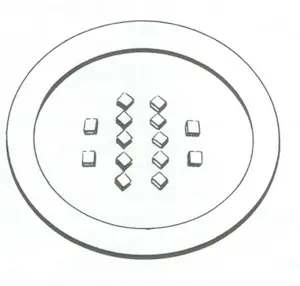
4. Brunoise Vegetable Cut (Square Allumete) – 1/16” X 1/16” X 1/16”
The Brunoise is a culinary technique used to finely dice vegetables or other ingredients into small, uniform cubes. This precise cut adds a polished and professional touch to dishes, allowing for even cooking and a visually appealing presentation. The dimensions of the Brunoise typically range from 1/16” to 1/8” in size, resulting in small, bite-sized pieces that blend seamlessly into recipes.
Brunoise (Square Allumette) Vegetable Cut:
Ingredients:
- Vegetables of your choice (commonly used for brunoise include carrots, onions, celery)
Equipment:
- Chef’s knife or a suitable cutting tool
- Cutting board
Instructions:
- Select Vegetables:
- Choose fresh and firm vegetables suitable for fine dicing.
- Wash and Prep:
- Wash the vegetables thoroughly and, if necessary, peel them.
- Cut Ends:
- Trim the ends of the vegetables if needed.
- Stabilize:
- Cut a thin slice off one side of the vegetable to create a flat surface for stability.
- Julienne:
- Make even, vertical cuts to create very thin matchsticks (julienne). Aim for matchsticks that are typically around 1/16 inch to 1/8 inch (0.16 to 0.32 cm) in width.
- Square Allumette:
- Stack the julienne cuts and make even, horizontal cuts to create very small, uniformly-sized cubes. Aim for cubes that are roughly the same width as the julienne cuts, resulting in a fine brunoise or square allumette.
- Uniformity:
- Aim for uniformity in size to ensure an even presentation.
- Use in Recipes:
- Brunoise or square allumette-cut vegetables are often used in fine dining dishes, sauces, consommés, or anywhere a refined and consistent texture is desired.
Example Recipe: Brunoise Vegetable Consommé
Ingredients:
- Brunoise-cut vegetables (carrots, onions, celery)
- Chicken or vegetable broth
- Egg whites
- Fresh herbs (thyme, parsley)
- Salt and pepper to taste
Instructions:
- Prepare Brunoise Vegetables:
- Brunoise-cut carrots, onions, and celery.
- Make Consommé:
- In a pot, combine chicken or vegetable broth with the brunoise-cut vegetables.
- Add fresh herbs, salt, and pepper to taste.
- Whisk Egg Whites:
- In a separate bowl, whisk egg whites until frothy.
- ClarifyClarify - To clear a liquid; such as consomme; by adding slightly beaten egg white. BrothBroth -� Is a flavourful liquid obtained from the long simmering of meats and/ or vegetables.:
- Gently pour the whisked egg whites into the simmering broth and stir.
- As the egg whites cook, they will rise to the top, trapping impurities and clarifying the consommé.
- Strain:
- Carefully strain the consommé through a fine mesh sieve or cheesecloth to remove the clarified liquid from the solids.
- Adjust SeasoningSeason / Seasoning - 1) To enhance the flavour by the addition of salt or other ingredients. 2) To m...:
- Taste and adjust the seasoning if necessary.
- Serve:
- Serve the brunoise vegetable consommé hot, garnished with additional fresh herbs if desired.
The brunoise or square allumette cut requires precision and attention to detail, making it suitable for elegant presentations and dishes that highlight fine knife skills. Adjust the ingredients and seasonings based on your preferences and the specific recipe you are preparing.
Common vegetables that are bruised include carrots, onions, leeks, celery, bell peppers, and hard root vegetables like beets and turnips. This technique is often used for garnishes and stuffings, and a regular brunoise measures 3 mm (1/8th inch) while a fine brunoise measures 1.5 mm (1/6th inch).
Several dishes showcase the finesse of the Brunoise cut. Begin your culinary journey with our Tomato and Cucumber Brunoise Salad, a refreshing combination of finely diced tomatoes, cucumbers, and aromatic herbs. The Brunoise technique ensures that each bite offers a balanced mix of flavors, providing a harmonious burst of freshness.
For a flavourful main course, the Brunoise Vegetable Ratatouille. This traditional French dish features a medley of finely diced eggplant, zucchini, bell peppers, and tomatoes, slowly cooked to perfection. The Brunoise cut ensures that the vegetables meld together beautifully, creating a rich and comforting dish that is as visually appealing as it is delicious.
How To Achieve a Brunoise Cut?
- Start by selecting a fresh vegetable or ingredient of your choice, such as carrots, onions, or tomatoes.
- Wash the vegetables thoroughly under running water to remove any dirt or debris.
- Trim off any ends or tops of the vegetable to create a clean, even surface.
- Cut the vegetables into small, uniform cubes. Begin by slicing the vegetable into thin planks or slices, aiming for a thickness of about 1/8” to 1/4”.
- Stack a few slices on top of each other to create a neat pile.
- With your non-dominant hand, hold the pile of slices firmly, keeping your fingers curled and away from the blade.
- Using a sharp chef’s knife, carefully slice across the pile of slices, creating thin strips.
- Turn the strips 90 degrees and make equally spaced, crosswise cuts to create small cubes. Aim for a uniform size of about 1/8” to 1/4” on each side.
- Repeat the process with the remaining vegetable until you have achieved the desired amount of Brunoise-cut cubes.
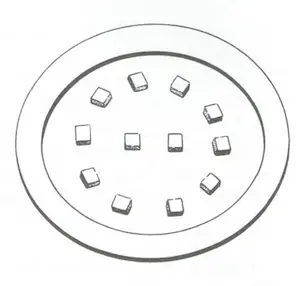
5. MacedoineDiced carrot and turnip mixed with peas and diamonds of French beans; as a vegetable garnish. Vegetable Cut (Square Julienne) – 1/8” X 1/8” X 1/8”

The macedoine cut, also known as “square julienne,” involves chopping vegetables into small, uniform cubes. This cut is often used for salads, garnishes, or as an ingredient in various dishes. Here’s a guide on how to perform a macedoine vegetable cut:
Macedoine (Square Julienne) Vegetable Cut:
Ingredients:
- Vegetables of your choice (commonly used for macedoine include carrots, turnips, peas)
Equipment:
- Chef’s knife or a suitable cutting tool
- Cutting board
Instructions:
- Select Vegetables:
- Choose fresh and firm vegetables suitable for small dicing.
- Wash and Prep:
- Wash the vegetables thoroughly and, if necessary, peel them.
- Cut Ends:
- Trim the ends of the vegetables if needed.
- Stabilize:
- Cut a thin slice off one side of the vegetable to create a flat surface for stability.
- Julienne:
- Make even, vertical cuts to create thin matchsticks (julienne). The size of the julienne can vary, but for a macedoine cut, aim for matchsticks that are typically around 1/8 inch to 1/4 inch (0.3 to 0.6 cm) in width.
- Square BatonFrench loaf made in the shape of a long thin stick.:
- Stack the julienne cuts and make even, horizontal cuts to create small, uniformly-sized cubes. Aim for cubes that are roughly the same width as the julienne cuts.
- Uniformity:
- Aim for uniformity in size to ensure an even presentation.
- Use in Recipes:
- Macedoine-cut vegetables are versatile and can be used in salads, as a garnish, or in dishes where a small, uniform cube size is desired.
Example Recipe: Macedoine Vegetable Salad
Ingredients:
- Macedoine-cut vegetables (carrots, turnips, peas)
- Potatoes, boiled and diced
- MayonnaiseThick cold basic sauce made of egg yolks; oil and vinegar; for serving with cold eggs; fish; vegetab...
- Dijon mustard
- Salt and pepper to taste
- Chopped fresh herbs (parsley, chives)
Instructions:
- Prepare Macedoine Vegetables:
- Macedoine-cut carrots, turnips, and peas.
- BoilBoil - To cook the food item in a boiling liquid. Very few items are boiled due to the fact that whi... Potatoes:
- Boil potatoes until tender, then dice into small cubes.
- CombineCombine: To mix two ingredients thoroughly. Vegetables:
- In a bowl, combine the macedoine-cut vegetables and diced potatoes.
- Prepare Dressing:
- In a separate bowl, mix mayonnaise, Dijon mustard, salt, and pepper to create a dressing.
- Toss and Garnish:
- Toss the vegetables with the dressing until well-coated.
- Garnish with chopped fresh herbs.
- ChillChill: To cool a mixture until its cold; but not frozen. and Serve:
- Allow the Macedoine Vegetable Salad to chill in the refrigerator before serving.
The macedoine cut adds a neat and uniform appearance to dishes, making it an attractive option for salads and presentations where visual appeal is important. Adjust the ingredients and seasonings based on your preferences and the specific recipe you are preparing.
How to Achieve Macedoine Cut?
- Select a fresh vegetable or ingredient of your choice, such as carrots, potatoes, or bell peppers.
- Wash the vegetables thoroughly under running water to remove any dirt or debris.
- Trim off any ends or tops of the vegetable to create a clean, even surface.
- Slice the vegetable lengthwise into long, thin planks or slices, aiming for a thickness of about 1/8” to 1/4”.
- Stack a few planks or slices on top of each other to create a neat pile.
- With your non-dominant hand, hold the pile of planks firmly, keeping your fingers curled and away from the blade.
- Using a sharp chef’s knife, carefully slice across the planks or slices, perpendicular to their length, to create thin strips. Aim for a thickness of about 1/8” to 1/4”.
- Take one of the strips and cut it into smaller, uniform pieces, also measuring about 1/8” to 1/4” in thickness. Repeat this process with the remaining strips, creating square-shaped cubes.
- Continue cutting the rest of the stacked planks or slices into square cubes until you have achieved the desired amount of Macedoine cut vegetables.
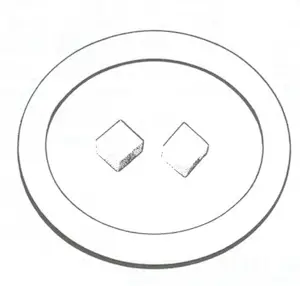
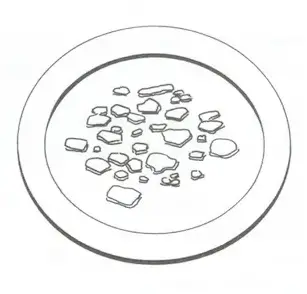
6. Small Dice (Square Baton) Vegetable Cut – 1/4” X 1/4” X 1 / 4”
Small dice, also known as a square baton, is a culinary technique that involves cutting ingredients into small, uniform cubes. This precise and consistent cut is used to enhance both the visual appeal and texture of dishes. The small dice dimensions typically range from 1/4” to 1/8”, resulting in bite-sized cubes that cook evenly and provide a satisfying mouthfeel.
The small dice, also known as a “square baton” or “brunoise” cut, involves chopping vegetables into small, evenly-sized cubes. This precision cut is commonly used in cooking to create a uniform texture in dishes. Here’s a guide on how to perform a small dice or square baton vegetable cut:
Small Dice (Square Baton) Vegetable Cut:
Ingredients:
- Vegetables of your choice (commonly used for brunoise include carrots, onions, bell peppers)
Equipment:
- Chef’s knife or a suitable cutting tool
- Cutting board
Instructions:
- Select Vegetables:
- Choose fresh and firm vegetables suitable for small dicing.
- Wash and Prep:
- Wash the vegetables thoroughly and, if necessary, peel them.
- Cut Ends:
- Trim the ends of the vegetables if needed.
- Stabilize:
- Cut a thin slice off one side of the vegetable to create a flat surface for stability.
- Slice:
- Place the flat side down on the cutting board.
- Make even, vertical cuts to create thin slices.
- Julienne:
- Stack the slices and make even, horizontal cuts to create thin matchsticks (julienne).
- Small Dice:
- Stack the julienne cuts and make even, horizontal cuts to create small, uniformly-sized cubes. For a small dice or square baton, aim for cubes that are typically around 1/8 inch to 1/4 inch (0.3 to 0.6 cm) in size.
- Uniformity:
- Aim for uniformity in size to ensure even cooking.
- Use in Recipes:
- Small dice vegetables are often used in recipes where a fine texture is desired, such as sauces, soups, and certain salads.
Example Recipe: Small Dice Vegetable Ratatouille
Ingredients:
- Small dice vegetables (zucchini, eggplant, bell peppers, tomatoes, onions)
- Olive oil
- Garlic, minced
- Herbs (thyme, rosemary, basil)
- Salt and pepper to taste
Instructions:
- Sauté Aromatics:
- Heat olive oil in a pan.
- Add minced garlic and sauté until fragrant.
- Add Small Dice Vegetables:
- Add the small dice vegetables (zucchini, eggplant, bell peppers, tomatoes, onions) to the pan.
- Cook Vegetables:
- StirStir: Mixing ingredients gently; using a circular motion with a spoon or whisk to ensure even cookin... and cook until the vegetables are tender but still hold their shape.
- Season:
- Add herbs (thyme, rosemary, basil), salt, and pepper to taste.
- SimmerSimmer - To cook food in a liquid which is just below the boiling point. The temperature of the liqu...:
- Allow the ratatouille to simmer for a few minutes to let the flavors meld.
- Adjust Seasoning:
- Taste and adjust seasoning if necessary.
- Serve:
- Serve the small dice vegetable ratatouille as a side dish or over pasta.
The small dice cut adds a refined and consistent texture to dishes, enhancing both visual appeal and flavor distribution. Experiment with different vegetables and recipes to incorporate small dice cuts into your cooking repertoire.
An example dish made with Small Dice is a Vegetable Ratatouille, a classic French dish that combines perfectly diced eggplant, zucchini, bell peppers, and tomatoes. The uniformity of the small dice ensures even cooking and a harmonious blend of flavors, creating a visually stunning and delectable dish.
How To Achieve a Small Dice Cut?
- Select a fresh ingredient, such as vegetables, fruits, or even meat, that you want to cut into small, uniform cubes.
- Wash the ingredients thoroughly under running water to remove any dirt or debris.
- Trim off any ends or tops of the ingredients to create a clean, even surface.
- Slice the ingredients into planks or slices, aiming for a thickness of about 1/4”.
- Stack a few slices on top of each other to create a neat pile.
- With your non-dominant hand, hold the pile of slices firmly, keeping your fingers curled and away from the blade.
- Using a sharp chef’s knife, carefully slice across the pile of slices, creating thin strips that are about 1/4” wide.
- Rotate the stack of strips 90 degrees and make equally spaced, crosswise cuts to create small cubes. Aim for a uniform size of about 1/4” on each side.
- Repeat the process with the remaining ingredient until you have achieved the desired amount of small dice cubes.
7. Medium Dice Vegetable Cut – 1/2” X 1/2” X 1/2”
The medium dice cut is a culinary technique that involves cutting ingredients into medium-sized, uniform cubes. This precise cut adds both aesthetic appeal and even cooking to dishes. With dimensions typically around 1/2” on each side, the medium dice create bite-sized cubes that are versatile and visually pleasing.
Medium dice are an essential skill for any chef or home cook who wants to create visually appealing dishes that are not only tasty but also uniform in size. The perfect size for medium dice is approximately 1/2 inch cubed pieces. This cut works well with ingredients such as potatoes, carrots, onions, celery, and bell peppers – all of which are common ingredients found in many recipes.
Dicing is a fundamental knife skill in the culinary world, and a “medium dice” refers to cutting vegetables into small, evenly-sized cubes of moderate size. Here’s a guide on how to perform a medium dice vegetable cut:
Medium Dice Vegetable Cut:
Ingredients:
- Vegetables of your choice (commonly used for dicing include potatoes, carrots, onions, bell peppers)
Equipment:
- Chef’s knife or a suitable cutting tool
- Cutting board
Instructions:
- Select Vegetables:
- Choose fresh and firm vegetables suitable for dicing.
- Wash and Prep:
- Wash the vegetables thoroughly and, if necessary, peel them.
- Cut Ends:
- Trim the ends of the vegetables if needed.
- Stabilize:
- Cut a thin slice off one side of the vegetable to create a flat surface for stability.
- Slice:
- Place the flat side down on the cutting board.
- Make even, vertical cuts to create slices.
- Dice:
- Stack the slices and make even, horizontal cuts to create cubes. For a “medium dice,” aim for cubes that are typically around 1/2 inch to 3/4 inch (1.3 to 1.9 cm) in size.
- Uniformity:
- Aim for uniformity in size to ensure even cooking.
- Use in Recipes:
- Medium dice vegetables are versatile and can be used in a variety of recipes, including soups, stews, stir-fries, or as part of side dishes.
Example Recipe: Medium Dice Vegetable Soup
Ingredients:
- Medium dice vegetables (carrots, celery, potatoes, onions)
- Chicken or vegetable broth
- Garlic, minced
- Herbs (thyme, rosemary)
- Salt and pepper to taste
- Olive oil
Instructions:
- Sauté Aromatics:
- Heat olive oil in a pot.
- Add minced garlic and sauté until fragrant.
- Add Vegetables:
- Add the medium dice vegetables (carrots, celery, potatoes, onions) to the pot.
- Cook Vegetables:
- Stir and cook for a few minutes until the vegetables start to soften.
- Season:
- Add herbs (thyme, rosemary), salt, and pepper to taste.
- Pour Broth:
- Pour in enough chicken or vegetable broth to cover the vegetables.
- Simmer:
- Simmer until the vegetables are tender and the flavors meld.
- Adjust Seasoning:
- Taste and adjust seasoning if necessary.
- Serve:
- Ladle the medium dice vegetable soup into bowls and serve hot.
Medium dice vegetables contribute to a balanced texture in dishes, and their uniform size ensures even cooking. Adapt the recipe according to your preferences and explore different ways to incorporate medium dice vegetables into your culinary creations.
One advantage of using medium-diced vegetables is that they cook more quickly and evenly than larger chunks or unevenly sized pieces.
How To achieve a medium dice cut?
- Start by selecting a fresh ingredient of your choice, such as vegetables, fruits, or even meat, that you want to cut into medium-sized, uniform cubes.
- Wash the ingredients thoroughly under running water to remove any dirt or debris.
- Trim off any ends or tops of the ingredients to create a clean, even surface.
- Slice the ingredient into planks or slices, aiming for a thickness of about 1/2”.
- Stack a few slices on top of each other to create a neat pile.
- With your non-dominant hand, hold the pile of slices firmly, keeping your fingers curled and away from the blade.
- Using a sharp chef’s knife, carefully slice across the pile of slices, creating thin strips that are about 1/2” wide.
- Rotate the stack of strips 90 degrees and make equally spaced, crosswise cuts to create medium-sized cubes. Aim for a uniform size of about 1/2” on each side.
- Repeat the process with the remaining ingredient until you have achieved the desired amount of medium dice cubes.
8. Large Dice Vegetable Cut – 3/4” X 3/4” X 3/4”
Large dice refer to a specific size and shape of cut vegetables or ingredients in the culinary world. It involves slicing the vegetables into uniform cubes, typically around 1 inch (2.5 cm) 3/4” X 3/4” X 3/4” on each side. Large dice are often used in recipes where the vegetables need to retain their shape and texture during cooking, such as in stews, soups, or stir-fries.
The larger size allows for a satisfying bite and ensures that the vegetables maintain some firmness when cooked. Large dice also add visual appeal to dishes, creating a vibrant and appealing presentation. Whether it’s onions, carrots, peppers, or other vegetables, cutting them into large dice adds both aesthetic and culinary value to a wide range of recipes.
Large dice is a culinary term that refers to the size of chopped vegetables in a recipe. It’s essential to have uniform cuts of vegetables for even cooking and presentation purposes. Large dice are commonly used in soups, stews, casseroles, and salads.
How to Achieve Large Dice Cut?
- Select your vegetables: Choose the vegetables you want to dice. Common options include onions, carrots, potatoes, bell peppers, and zucchini.
- Prep your vegetables: Wash the vegetables thoroughly under running water. Peel them if necessary, such as with carrots and potatoes. Remove any seeds, stems, or tough parts.
- Cut into large sections: Use a sharp chef’s knife or a vegetable knife to cut the vegetables into large sections. For example, cut an onion into halves or quarters, a bell pepper into large chunks, or a carrot into thick batons.
- Square off the sections: Take each section and square off the edges. Trim the rounded edges to create flat sides. This will make it easier to achieve consistent dice.
- Measure and mark: If you want precise large dice, you can use a ruler to measure the desired size (e.g., 1 inch) and make marks on the sides of the vegetable sections as a guide. This step is optional but can help ensure uniformity.
- Make straight downward cuts: Holding the vegetable section steady with your non-dominant hand, use your dominant hand to make straight downward cuts with the knife. Aim for the desired size of dice, such as 1 inch (2.5 cm) on each side.
- Repeat for remaining sections: Continue cutting the rest of the vegetable sections into large dice using the same technique. Take your time and be cautious while using the knife.
Dicing is a basic knife skill in which vegetables are cut into small, evenly-sized cubes. The size of the dice can vary, and a “large dice” typically means larger cubes. Here’s a guide on how to perform a large dice vegetable cut:
Large Dice Vegetable Cut:
Ingredients:
- Vegetables of your choice (commonly used for dicing include potatoes, carrots, onions, bell peppers)
Equipment:
- Chef’s knife or a suitable cutting tool
- Cutting board
Instructions:
- Select Vegetables:
- Choose fresh and firm vegetables suitable for dicing.
- Wash and Prep:
- Wash the vegetables thoroughly and, if necessary, peel them.
- Cut Ends:
- Trim the ends of the vegetables if needed.
- Stabilize:
- Cut a thin slice off one side of the vegetable to create a flat surface for stability.
- Slice:
- Place the flat side down on the cutting board.
- Make even, vertical cuts to create large slices.
- Large Dice:
- Stack the slices and make even, horizontal cuts to create large cubes. The size of the dice can vary, but for a “large dice,” aim for cubes that are around 1 to 1.5 inches (2.5 to 3.8 cm) in size.
- Uniformity:
- Aim for uniformity in size to ensure even cooking.
- Use in Recipes:
- Large dice vegetables are commonly used in soups, stews, casseroles, or as roasted or sautéed side dishes.
Example Recipe: Large Dice Vegetable Stir-Fry
Ingredients:
- Large dice vegetables (bell peppers, carrots, zucchini)
- Olive oil
- Soy sauce
- Garlic, minced
- Ginger, grated
- Sesame seeds for garnish
Instructions:
- Prepare Vegetables:
- Large dice the vegetables.
- Stir-Fry:
- Heat olive oil in a wok or pan.
- Add minced garlic and grated ginger, and stir-fry until fragrant.
- Add the large dice vegetables and stir-fry until they are tender-crisp.
- Season:
- Drizzle soy sauce over the vegetables and toss to coat.
- Finish:
- Garnish with sesame seeds before serving.
- Serve:
- Serve the large dice vegetable stir-fry over rice or noodles.
Large dice vegetables provide a hearty and satisfying texture to dishes and are commonly used in various cooking applications. Adjust the ingredients and seasonings based on your preferences and the specific recipe you are preparing.
9. Slice Vegetable Cut 1/8″ X 1/2″
Slicing is a Culinary Technique of Cutting vegetables into uniform cross-cuts and is essential for cooking dishes that require even cooking. One of the most common examples of this technique is slicing onions, an ingredient used in many dishes around the world.
How to Achieve Slice Cut?
1. Select the right knife: For most vegetable slicing and cutting tasks, a chef’s knife or a santoku knife is suitable. Make sure the knife is sharp for clean Slice cuts.
2. Wash the vegetables Onion, Carrot, Tomato, etc.: Rinse the vegetables under cold water to remove any dirt or debris. Pat them dry with a clean kitchen towel or paper towel.
3. Trim and peel (if necessary): Trim off any stems, ends, or blemishes from the vegetables. If required, peel the vegetables using a vegetable peeler.
4. Cut into manageable pieces: If the vegetables are large, you may want to cut them into smaller, more manageable pieces before slicing. For example, for onions, you can cut them in half and then slice each half.
5. Choose the desired thickness: Decide how thick you want your vegetable slices to be. This can vary depending on the recipe or personal preference.
6. Hold the vegetable securely: Use a firm grip on the vegetable to ensure safety while slicing. Curl your fingers under and use your knuckles as a guide against the blade, keeping them slightly ahead of the knife.
7. Slice the vegetable: With a controlled motion, use a downward and forward motion to slice through the vegetable. Keep the tip of the knife in contact with the cutting board and use a rocking motion to guide the blade through the vegetable.
8. Repeat as needed: Continue slicing the vegetables according to your desired thickness and recipe requirements. Take your time and maintain a steady pace to ensure consistent slices.
“Slicing” is a fundamental cutting technique in the culinary world, where vegetables are cut into flat, elongated pieces. The size and thickness of the slices can vary depending on the recipe’s requirements. Here is a basic guide on how to slice vegetables:
Slice Vegetable Cut:
Ingredients:
- Vegetables of your choice (commonly used for slicing include cucumbers, tomatoes, onions, bell peppers)
Equipment:
- Chef’s knife or a suitable cutting tool
Instructions:
- Select Vegetables:
- Choose fresh and firm vegetables suitable for slicing.
- Wash and Prep:
- Wash the vegetables thoroughly and, if necessary, peel them.
- Cut Ends:
- Trim the ends of the vegetables if needed.
- Stabilize:
- Cut a thin slice off one side of the vegetable to create a flat surface for stability.
- Slice:
- Place the flat side down on the cutting board.
- Using a sharp chef’s knife, make even, horizontal cuts to create slices of your desired thickness.
- Adjust Thickness:
- Adjust the thickness of the slices based on your recipe. For example, thicker slices are often used in stir-fries, while thinner slices work well for salads.
- Uniformity:
- Aim for uniformity in size to ensure even cooking or a consistent appearance in your dish.
- Use in Recipes:
- Sliced vegetables are versatile and can be used in salads, sandwiches, stir-fries, or as a side dish.
Example Recipe: Classic Caprese Salad
Ingredients:
- Sliced tomatoes
- Fresh mozzarella, sliced
- Fresh basil leaves
- Extra-virgin olive oil
- Balsamic glaze
- Salt and pepper to taste
Instructions:
- Assemble Slices:
- Arrange alternating slices of tomatoes and fresh mozzarella on a serving platter.
- Add Basil Leaves:
- Tuck fresh basil leaves between the tomato and mozzarella slices.
- Season:
- Drizzle extra-virgin olive oil and balsamic glaze over the slices.
- Sprinkle with salt and pepper to taste.
- Serve:
- Serve the classic Caprese salad as a refreshing appetizer or side dish.
Slicing is a straightforward cutting technique that is commonly used in everyday cooking. It is suitable for a wide range of vegetables and can be adapted to various recipes and cuisines.
Remember, practice and caution are essential when handling sharp knives. Always pay attention to your fingers and keep them away from the blade. If you’re unsure about your knife skills, consider taking a cooking class or watching online tutorials for additional guidance.
10. Paysanne – 1/2” diameter spheres or triangles.
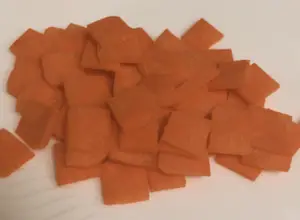
Paysanne vegetable cut is one of the most commonly used techniques in culinary arts. It involves cutting vegetables into small, thin pieces that are usually square or rectangular. The technique is often used to add texture and color to dishes, and it works well with a variety of vegetables.
The paysanne cut refers to a specific method of cutting vegetables into small, even shapes, often either cubes or rounds. If you want to create paysanne cuts with 1/2-inch diameter spheres or triangles, you can follow these general guidelines:
Paysanne Cut (1/2-inch Diameter Spheres or Triangles):
Ingredients:
- Firm vegetables (commonly used for paysanne cuts include carrots, zucchini, bell peppers)
Equipment:
- Paring knife or chef’s knife
- Parisienne scoop or melon baller (for spheres)
- Cutting board
Instructions:
For Paysanne Spheres (1/2-inch Diameter):
- Select Ingredients:
- Choose firm vegetables suitable for paysanne cuts.
- Peel if Necessary:
- Peel the vegetables if needed. Some vegetables may be paysanne-cut with the peel intact for added color.
- Create Round Shapes:
- If using a melon baller or Parisienne scoop, press it into the flesh of the vegetable to create 1/2-inch diameter spheres.
- Apply gentle pressure and twist the scoop to release the round shapes.
- Uniformity:
- Aim for uniformity in size to ensure an attractive presentation.
For Paysanne Triangles (1/2-inch Diameter):
- Select Ingredients:
- Choose firm vegetables suitable for paysanne cuts.
- Peel if Necessary:
- Peel the vegetables if needed.
- Cut Into Slices:
- Slice the vegetables into rounds with a thickness of 1/2 inch.
- Cut Into Triangles:
- Take each round slice and cut it into triangles. You can do this by making two diagonal cuts across the diameter.
- Uniformity:
- Aim for uniformity in size to ensure an attractive presentation.
Use in Recipes:
- Paysanne-cut vegetables can be used in salads, stir-fries, or as garnishes.
- The paysanne cut adds visual appeal to dishes and ensures that the vegetables cook evenly.
Example Recipe: Paysanne Vegetable Stir-Fry
Ingredients:
- Paysanne-cut vegetables (carrots, zucchini, bell peppers)
- Soy sauce
- Sesame oil
- Garlic, minced
- Ginger, grated
- Green onions, chopped
- Sesame seeds for garnish
Instructions:
- Stir-Fry Paysanne Vegetables:
- Heat sesame oil in a wok or pan.
- Add minced garlic and grated ginger, and stir-fry until fragrant.
- Add paysanne-cut vegetables and stir-fry until they are tender-crisp.
- Season:
- Drizzle soy sauce over the vegetables and toss to coat.
- Finish:
- Garnish with chopped green onions and sesame seeds.
- Serve:
- Serve the paysanne vegetable stir-fry over rice or noodles.
The paysanne cut allows you to present vegetables in an aesthetically pleasing manner while ensuring they cook evenly in various dishes. Adjust the ingredients and seasonings based on your preferences and the specific recipe you are preparing.
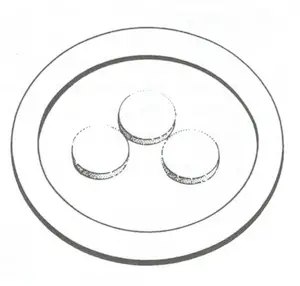
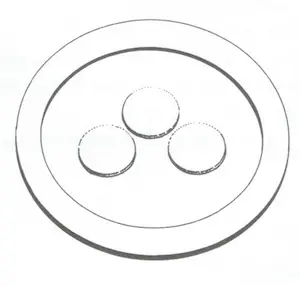
11. Parisienne Round Shaped cut. 1/2 Inch Diameter
The Parisienne vegetable cut is a classic French technique that involves creating small, round balls of vegetables using a special tool called a melon baller. This technique is often used for root vegetables like carrots and turnips, but can also be used for fruits like melons and apples. The resulting uniform size and shape of the vegetables not only look beautiful on a plate but also ensures even cooking.
One of the benefits of using this technique is that it creates uniform pieces that cook evenly. This is particularly important when you are cooking vegetables that require even cooking times, such as potatoes or carrots. Additionally, the Parisienne cut adds an element of sophistication to any dish such as adding them to soups, stews, salads, or as decorative elements in side dishes and elegance to your presentations, elevating the overall visual appeal of your dishes.
How To Achieve a Parisienne Cut?
- Choose the right vegetables: Select firm and evenly shaped vegetables that are suitable for this technique, such as potatoes, carrots, turnips, or beets. The size of the vegetable should be large enough to work comfortably.
- Peel the vegetable: Start by peeling the vegetable using a vegetable peeler or a knife, ensuring that the skin is completely removed.
- Create barrel-shaped cuts: Using a small, round melon baller or a Parisienne scoop (a specialized tool for this technique), dig into the flesh of the vegetable at a slight angle, creating small, round cuts. Apply gentle pressure and rotate the scoop to create even spheres.
- Repeat the process: Continue making these barrel-shaped cuts, rotating the vegetable as needed, until you have transformed most of the vegetable into small, round spheres. Try to make the spheres as uniform in size as possible for a visually appealing presentation.
- Utilize the remaining vegetable: Depending on the size of the vegetable, you may end up with some irregular-shaped pieces. You can use these leftover parts for other culinary purposes, such as dicing or slicing, or save them for later use.
- Rinse and pat dry: Once you have achieved the desired Parisienne cuts, rinse the vegetable spheres under cold water to remove any excess starch or dirt. Pat them dry gently using a clean kitchen towel or paper towel.
The Parisienne cut, also known as “Parisienne balls” or “Parisienne scoop,” is a round-shaped cut that involves using a melon baller or a small Parisienne scoop to create small, uniformly-sized balls from fruits or vegetables. Here’s a guide on how to perform a Parisienne cut with a 1/2 inch diameter:
Parisienne Cut:
Ingredients:
- Firm fruits or vegetables (commonly used for Parisienne cut include potatoes, melons, or carrots)
Equipment:
- Parisienne scoop or melon baller
- Paring knife (optional)
Instructions:
- Select Ingredients:
- Choose firm and fresh fruits or vegetables suitable for the Parisienne cut.
- Peel if Necessary:
- Peel the fruits or vegetables if needed. Some items may be Parisienne-cut with the peel intact for added color.
- Size Adjustment:
- Ensure your Parisienne scoop or melon baller is adjusted to create balls with a 1/2 inch diameter.
- Create Round Shapes:
- Press the Parisienne scoop or melon baller into the flesh of the fruit or vegetable, creating small, round balls.
- Apply gentle pressure and twist the scoop to release the round shape.
- Uniformity:
- Aim for uniformity in size to ensure an attractive presentation.
- Optional Finishing Touch:
- If you don’t have a Parisienne scoop, you can use a paring knife to carefully shape the round cuts by hand, creating small, even spheres.
- Use in Recipes:
- Parisienne-cut fruits or vegetables can be used as decorative elements in salads, garnishes, or as part of creative presentations.
Example Recipe: Parisienne Potato Salad
Ingredients:
- Parisienne-cut potatoes
- Mayonnaise
- Dijon mustard
- Pickles, finely chopped
- Red onion, finely chopped
- Salt and pepper to taste
- Chopped fresh herbs (parsley, chives)
Instructions:
- Boil Parisienne Potatoes:
- Boil Parisienne-cut potatoes in salted water until they are tender but still firm.
- Prepare Dressing:
- In a bowl, mix mayonnaise, Dijon mustard, salt, and pepper to create a creamy dressing.
- Combine Ingredients:
- Toss the boiled Parisienne-cut potatoes with the dressing.
- Add finely chopped pickles, red onion, and fresh herbs.
- Chill and Serve:
- Allow the potato salad to chill in the refrigerator before serving.
Parisienne-cut vegetables or fruits can add a touch of elegance and visual interest to your dishes, making them suitable for special occasions or when you want to enhance the presentation of your meals.
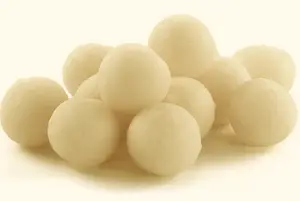
12. Olivette – Olived Shaped Cut. 1/2 Inch
The Olivette cut is a unique vegetable cutting technique that was popularised in the 17th century. This technique involves slicing vegetables into small, thin pieces that resemble the shape of an olive. The result is a visually stunning dish that is both delicious and nutritious.
The compact design makes it easy to store in your kitchen, and the non-slip base ensures it stays in place while you work. Whether you’re making a salad, stir-fry, or soup, the Olivette Vegetable Cut can help you save time and create perfectly sliced or diced vegetables every time.
Olivette cuts are particularly suited for small potatoes or carrots due to their elongated shape. These vegetable shapes can be used in various culinary applications, such as garnishing salads, skewering them as part of appetizers, or incorporating them into vegetable platters for an added touch of visual interest.
How To Achieve an Olivette Vegetable Cut?
1. Select the right vegetable: For Olivette cuts, you’ll need small, elongated vegetables such as baby potatoes, fingerling potatoes, or small carrots. These vegetables should be firm and have a shape that is conducive to being trimmed into oblong shapes.
2. Trim the vegetable ends: Begin by trimming the ends of the vegetable to create a flat surface. This will help stabilize the vegetables during the cutting process.
3. Create oblong cuts: Using a sharp knife, carefully cut the vegetable at a slight angle to create oblong shapes resembling olives. Apply even pressure and maintain a consistent size and shape for a uniform presentation.
4. Repeat the process: Continue making these oblong cuts, rotating the vegetable as needed, until you have transformed most of the vegetable into olive-shaped pieces. Aim for consistency in size and shape for an appealing appearance.
5. Rinse and pat dry: Once you have achieved the Olivette cuts, rinse the vegetable shapes under cold water to remove any residue or dirt. Pat them dry gently using a clean kitchen towel or paper towel.
The term “olivette” refers to a knife cut that shapes vegetables or fruits into small, olive-like shapes. When creating an olivette cut, the goal is to make small, oval-shaped pieces, resembling the size and shape of olives. Here’s a simple guide for making olivette cuts with a 1/2 inch size:
Olivette Cut:
Ingredients:
- Vegetables (commonly used for olivettes include potatoes, carrots, or turnips)
Equipment:
- Paring knife or turning knife
Instructions:
- Select Vegetables:
- Choose firm and evenly-sized vegetables for consistent cuts.
- Peel the Vegetables:
- Peel the vegetables if desired. The olivette cut can be done with or without the peel.
- Cut the Ends:
- Trim a small slice off each end of the vegetable to create flat surfaces for stability.
- Create the Olivette Shape:
- Hold the vegetable at a slight angle to the cutting board.
- Starting from one end, make a small cut at an angle to create an oval shape.
- Rotate the vegetable slightly and make another angled cut, forming the opposite side of the oval.
- Continue this process, rotating the vegetable and making angled cuts, until the entire vegetable has a series of evenly spaced, olive-shaped cuts.
- Uniformity:
- Aim for uniformity in size and shape to ensure an attractive presentation.
- Adjust for 1/2 Inch Size:
- Pay attention to the size of the olivettes, ensuring that each piece is approximately 1/2 inch in length.
- Cooking:
- Olivettes can be used in salads, as a garnish, or as a side dish. They cook quickly due to their small size.
Example Recipe: Olivette Potato Salad
Ingredients:
- Olivette-cut potatoes
- Olive oil
- Dijon mustard
- Red onion, finely chopped
- Fresh herbs (parsley, chives)
- Salt and pepper to taste
Instructions:
- Boil Olivettes:
- Boil olivette-cut potatoes in salted water until they are tender but still firm.
- Prepare Dressing:
- In a bowl, whisk together olive oil, Dijon mustard, salt, and pepper.
- Combine Ingredients:
- Toss the boiled olivette-cut potatoes with the dressing.
- Add finely chopped red onion and fresh herbs.
- Chill and Serve:
- Allow the potato salad to chill in the refrigerator before serving.
Olivette cuts add a unique and elegant touch to dishes, enhancing their visual appeal. This technique is often used in professional kitchens to create visually appealing presentations for salads, side dishes, or garnishes.
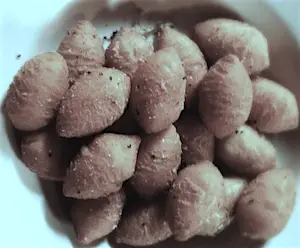
13. Noisette / Toulenee / Turned Vegetable Cut
The terms “noisette,” “tourné,” or “turned” in the context of vegetable cutting refer to a specific and intricate knife cut that transforms vegetables into small, barrel or football-like shapes. This classic French technique is often used for root vegetables, such as potatoes, carrots, or turnips. The tourné cut not only adds an artistic touch to dishes but also helps vegetables cook more evenly. Here’s how you can perform a tourné cut:
Tourné Cut:
Ingredients:
- Root vegetables (potatoes, carrots, turnips)
Equipment:
- Paring knife or turning knife
Instructions:
- Select Vegetables:
- Choose firm and evenly-sized vegetables for consistent cuts.
- Peel the Vegetables:
- Peel the vegetables if desired. The tourné cut can be done with or without the peel.
- Cut the Ends:
- Cut a small slice off one end of the vegetable to create a flat surface for stability.
- Create the Football Shape:
- Starting from the cut end, make a small, angled cut towards the center of the vegetable, forming one side of the football shape.
- Rotate and Repeat:
- Rotate the vegetable and make another angled cut, creating the opposite side of the football shape.
- Continue this process, rotating the vegetable and making angled cuts, until the entire vegetable has a series of evenly spaced, football-like shapes.
- Uniformity:
- Aim for uniformity in size and shape to ensure even cooking.
- Optional Step – Noisette Cut:
- For a more refined version, you can round off the edges of each football shape, creating a small, smooth, barrel-like cut. This is known as the “noisette” cut.
- Cooking:
- Tourné-cut vegetables are often used in dishes where an elegant presentation is desired, such as in classic French cuisine.
Example Recipe: Tourné-cut Vegetables Medley
Ingredients:
- Tourné-cut carrots, potatoes, and turnips
- Olive oil
- Salt and pepper
- Fresh herbs (thyme, rosemary)
- Optional: Garlic cloves
Instructions:
- Preheat Oven:
- Preheat your oven to 400°F (200°C).
- Prepare Vegetables:
- Toss tourné-cut vegetables with olive oil, salt, pepper, and fresh herbs.
- Optionally, add whole garlic cloves for extra flavor.
- RoastRoast - To cook food by surrounding it with dry heat.:
- Arrange the vegetables on a baking sheet in a single layer.
- Roast in the preheated oven for about 30-40 minutes or until the vegetables are golden brown and tender.
- Garnish and Serve:
- Garnish with additional fresh herbs before serving.
The tourné cut requires practice and precision but adds a touch of sophistication to your dishes. It’s a skill often taught in culinary schools and is used to enhance the visual appeal of plated meals.
14. Chateau Vegetable Cut

The term “château” in the context of vegetable cutting typically refers to a specific way of preparing and presenting certain vegetables, especially root vegetables like potatoes. The château cut involves shaping the vegetable into small, evenly-sized barrel or oval shapes. This cut is often associated with classic French culinary techniques and is used to enhance the visual appeal of dishes.
Here’s how you can perform a château cut on potatoes:
Château Cut Potatoes:
Ingredients:
- Potatoes
Instructions:
- Select Potatoes:
- Choose firm and evenly-sized potatoes for consistent cuts.
- Peel the Potatoes:
- Peel the potatoes if desired. The château cut can be done with or without the peel.
- Shape the Potatoes:
- Cut the ends off the potato to create a flat surface for stability.
- With a knife, shape the potato into a barrel or oval shape by removing the corners, making it look like a small, cylindrical “château.”
- Even SizingSizing are the laundry chemicals added to the wash cycle to stiffen polyester blends.:
- Aim for uniformity in size and shape to ensure even cooking.
- Optional Step – Tourner Cut:
- For a more refined presentation, you can further shape the château-cut potatoes into “tourner” shapes. This involves cutting seven equal sides around the potato, creating a football-like shape.
- Cooking:
- Château-cut potatoes can be roasted, boiled, or used in various dishes where small, uniform shapes are desired.
Example Recipe: Roasted Château Potatoes
Ingredients:
- Château-cut potatoes
- Olive oil
- Salt and pepper
- Fresh herbs (rosemary, thyme) for garnish
Instructions:
- Preheat Oven:
- Preheat your oven to 400°F (200°C).
- CoatCoat - To cover with a layer; usually thin; of some substance; such as flour; aspic or oil. Potatoes:
- Toss the château-cut potatoes in olive oil, ensuring they are well-coated.
- Season:
- Season the potatoes with salt and pepper to taste. Add fresh herbs for added flavor.
- Roast:
- Arrange the potatoes on a baking sheet in a single layer.
- Roast in the preheated oven for about 30-40 minutes or until the potatoes are golden brown and tender.
- Garnish and Serve:
- Garnish with additional fresh herbs before serving.
Château-cut vegetables add a touch of elegance to your dishes and can be a visually appealing side dish. This technique requires a bit of practice, but the results are worth it for special occasions or when you want to elevate the presentation of your meals.
15. Concasse Vegetable Cut
A “concassé” is a cooking term that refers to a specific method of peeling, seeding, and chopping tomatoes. The term itself is French and means “to crush” or “to grind.” The concassé technique is commonly used in preparing tomatoes for sauces, salsas, and other dishes where a smoother texture is desired. Here’s how to create a concassé vegetable cut, focusing on tomatoes:
Tomato Concassé:
Ingredients:
- Ripe tomatoes
Instructions:
- BlanchBlanch - To cook a food item partially and very briefly in boiling water/liquid or hot oil. Example ... the Tomatoes:
- Bring a pot of water to a boil.
- Make a small “X” mark on the bottom of each tomato with a knife.
- Drop the tomatoes into the boiling water for about 30 seconds to 1 minute, or until you see the skin starting to peel.
- Ice Bath:
- Immediately transfer the tomatoes to an ice-cold water bath or run them under cold tap water. This process is known as blanching and shocking, and it helps loosen the skin.
- Peel the Tomatoes:
- Once the tomatoes are cool, use a knife to peel off the skin starting from the “X” mark. The skin should come off easily.
- Seed the Tomatoes:
- Cut the tomatoes in half horizontally. Hold each tomato half over a bowl and gently squeeze to remove the seeds. You can also use a spoon to scoop out the seeds.
- Chop the Tomatoes:
- After peeling and seeding, chop the tomatoes into small, even pieces. The size of the chop will depend on your recipe. Typically, it’s a small to medium dice.
- Use in Recipes:
- The tomato concassé is now ready to be used in sauces, salsas, salads, or any recipe that calls for diced or chopped tomatoes.
Example Recipe: Tomato Basil Concassé Pasta Sauce
Ingredients:
- Tomato concassé (prepared as per the instructions above)
- Fresh basil, chopped
- Garlic, minced
- Olive oil
- Salt and pepper to taste
- Optional: Grated ParmesanVery hard cheese with a sharp flavour; nearly always used grated for sprinkling over pasta dishes. cheese
Instructions:
- Sauté Aromatics:
- Heat olive oil in a pan and sauté minced garlic until fragrant.
- Add Tomato Concassé:
- Add the chopped tomato concassé to the pan and cook over medium heat.
- Season:
- Season with salt and pepper to taste. Allow the sauce to simmer until it thickens slightly.
- Finish:
- Stir in fresh chopped basil just before serving.
- Serve:
- Toss the sauce with your favorite pasta and garnish with grated Parmesan cheese if desired.
The tomato concassé technique enhances the texture and flavor of dishes that require tomatoes, providing a smoother consistency without the skin and seeds.
16. Chop / Chopping
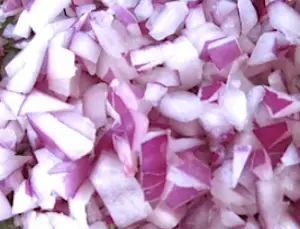
Chopping is a cutting technique in which food items are cut into smaller pieces using a knife or another cutting tool. This technique is commonly used in cooking to prepare ingredients for a variety of dishes. The size and style of the chop can vary depending on the recipe. Here’s a basic guide on chopping:
How to Chop:
Ingredients:
- Vegetable, fruit, meat, or any food item you need to chop
Equipment:
- Chef’s knife or a suitable cutting tool
Instructions:
- Prepare the Food:
- Wash and peel (if necessary) the food item you want to chop.
- Secure the Cutting Surface:
- Place a damp cloth or a non-slip mat under your cutting board to prevent it from slipping.
- Choose the Right Knife:
- Use a sharp chef’s knife for most chopping tasks. For more delicate items, you might use a paring knife.
- Proper Grip:
- Hold the knife with a firm grip. Curl your fingertips under and use your knuckles as a guide against the side of the food item to avoid cutting yourself.
- Chopping Technique:
- For vegetables, slice the food item in half, then place the flat side down on the cutting board to create a stable surface.
- Make horizontal cuts, and then make vertical cuts, creating a grid pattern.
- For herbs, stack the leaves, roll them tightly, and then make thin slices.
- Adjust for Size:
- Adjust the size of the chop based on the recipe. For example, a fine chop for minced garlic or a larger chop for diced onions.
- Use a Rocking Motion:
- For efficient chopping, use a rocking motion by moving the knife back and forth while keeping the tip of the knife on the cutting board.
- Gather and Continue:
- Gather the chopped pieces using the flat side of the knife and continue chopping until you achieve the desired size.
Example Recipe: Chopped Salad
Ingredients:
- Cucumbers
- Tomatoes
- Red onion
- Bell peppers
- Feta cheese
- Olives
- Olive oil, balsamic vinegar, salt, and pepper
Instructions:
- Chop Vegetables:
- Chop cucumbers, tomatoes, red onion, bell peppers, and olives into bite-sized pieces.
- Combine and Dress:
- Combine all the chopped vegetables in a bowl.
- Drizzle with olive oil and balsamic vinegar. Season with salt and pepper.
- Toss and Serve:
- Toss the salad to coat the vegetables evenly with the dressing.
- Top with crumbled feta cheese.
- Serve and enjoy your freshly chopped salad.
Chopping is a fundamental cooking skill, and mastering this technique can make food preparation more efficient and enjoyable.
17. Mincer Cut
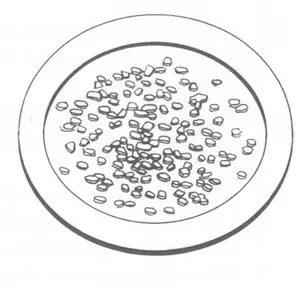
A “mincer cut” refers to the way food is cut using a kitchen tool called a mincer, which is commonly known as a meat grinder or food chopper. A mincer is designed to finely chop or grind food into small, uniform pieces. While it is often used for meat, it can also be used for vegetables, nuts, or other ingredients. Here’s a general guide on how to achieve a mincer cut:
Mincer Cut:
Ingredients:
- Meat, vegetables, or other ingredients of your choice
Equipment:
- Mincer or meat grinder
Instructions:
- Prepare Ingredients:
- Ensure that the meat or vegetables are cleaned, trimmed, and cut into pieces that fit into the mincer’s feeding tube.
- Assemble the Mincer:
- Follow the manufacturer’s instructions to assemble the mincer. Typically, you’ll attach a blade and a grinding plate with small holes for a finer mince.
- Chop or Grind:
- Start feeding the pieces of meat or vegetables into the mincer’s feeding tube.
- Turn the crank or switch on the electric mincer to grind the ingredients.
- Collect the Mince:
- As the ingredients are processed, the minced or ground mixture will come out of the mincer’s spout.
- Repeat if Necessary:
- If you have a large quantity, you may need to repeat the process until all the ingredients are minced.
- Use Immediately or Store:
- Use the minced mixture immediately in your recipe, or store it in the refrigerator or freezer based on your needs.
Example Recipe: Homemade Ground Meat
Ingredients:
- Beef or chicken chunks
Instructions:
- Preparation:
- Cut the meat into small pieces that fit into the mincer.
- Assemble Mincer:
- Assemble the mincer with the appropriate blade and grinding plate.
- Mince:
- Feed the meat through the mincer, collecting the ground meat on the other side.
- Season or Use:
- Season the ground meat according to your recipe or use it immediately in dishes like burgers, meatballs, or tacos.
Always follow the safety guidelines provided by the manufacturer when using a mincer, and ensure that the equipment is clean and in good working condition. The mincer cut provides a consistent texture and is particularly useful when you want a finer result compared to manual chopping.
18. Emincer Cut
The term “émincé” is a French word that translates to “thinly sliced” or “julienned” in English. An “émincer cut” typically refers to cutting food items, especially vegetables or meat, into thin, uniform slices. Here’s how you can achieve an émincé cut:
Émincé Cut:
Ingredients:
- Vegetables or meat of your choice
Instructions:
- Preparation:
- Wash and peel (if necessary) the vegetables or trim the meat.
- Cutting Technique:
- Use a sharp chef’s knife for precise slicing.
- For vegetables, slice them thinly, creating uniform pieces. You can cut them into strips, matchsticks, or small slices.
- Uniformity:
- Aim for uniformity in thickness to ensure even cooking.
- For Meat:
- If you’re émincé cutting meat, ensure it is partially frozen for easier slicing.
- Slice the meat thinly against the grain.
- Uses:
- Émincé cuts are commonly used in stir-fries, salads, and certain French culinary dishes.
Example Stir-Fried Chicken Émincé:
Ingredients:
- Thinly sliced chicken breast
- Soy sauce
- Garlic (minced)
- Ginger (minced)
- Vegetables (bell peppers, broccoli, carrots), thinly sliced
- Sesame oil
- Salt and pepper to taste
- Green onions for garnish
Instructions:
- MarinateMarinate / Marination - To soak food is a flavorful liquid to add flavour and to tenderize. Chicken:
- Marinate the thinly sliced chicken in soy sauce, minced garlic, minced ginger, salt, and pepper for at least 15-30 minutes.
- Stir-Fry:
- Heat oil in a wok or pan over high heat.
- Add the marinated chicken and stir-fry until cooked through.
- Vegetables:
- Add the thinly sliced vegetables to the wok and continue stir-frying until they are tender-crisp.
- Finish:
- Drizzle with sesame oil for flavor.
- Garnish with chopped green onions.
- Serve:
- Serve the stir-fried chicken émincé over rice or noodles.
This émincé cut allows for quick cooking and a delightful presentation in various dishes. Adjust the ingredients and seasonings based on your preferences and the specific recipe you are preparing.
19. Sherd
Shredded Vegetable Cut:
Ingredients:
- Vegetables of your choice (carrots, cabbage, zucchini, bell peppers, etc.)
Instructions:
- Prepare the Vegetables:
- Wash and peel (if necessary) the vegetables.
- Choose the Cutting Tool:
- You can use a sharp knife for manual shredding or use a grater, mandoline, or a food processor with a shredding attachment for a quicker and more uniform result.
- Manual Shredding:
- If using a knife, slice the vegetables thinly into long, matchstick-like pieces. You can then stack these slices and cut them into thin strips.
- Using a Grater:
- If using a box grater, choose the side with larger holes to shred the vegetables. Hold the vegetable against the grater and move it back and forth to create thin shreds.
- Using a Food Processor or Mandoline:
- Follow the manufacturer’s instructions for the shredding attachment. Place the vegetables in the chute and process them into thin strips.
- Use Immediately or Store:
- Shredded vegetables are versatile and can be used in salads, stir-fries, wraps, or as a garnish. If not using immediately, store them in an airtight container in the refrigerator.
Example Stir-Fried Shredded Vegetables:
Ingredients:
- Shredded carrots
- Shredded cabbage
- Shredded bell peppers
- Soy sauce
- Ginger and garlic (minced)
- Sesame oil
- Salt and pepper to taste
- Optional: Spring onions, sesame seeds
Instructions:
- Stir-Fry:
- Heat some oil in a wok or pan.
- Add minced ginger and garlic, and stir-fry for a minute.
- Add shredded vegetables and stir-fry on high heat until they are cooked but still crisp.
- Seasoning:
- Add soy sauce, sesame oil, salt, and pepper to taste. Toss well to coat the vegetables evenly.
- Garnish and Serve:
- Garnish with chopped spring onions and sesame seeds if desired.
- Serve as a side dish or over rice or noodles.
Feel free to adjust the seasoning and vegetables based on your preferences.
In conclusion, the type of vegetable cut used in the kitchen can greatly impact the texture, flavor, and presentation of a dish. Familiarizing yourself with these various cuts can enhance your culinary skills and take your dishes to the next level.